
[fusion_builder_container hundred_percent=”no” equal_height_columns=”no” menu_anchor=”” hide_on_mobile=”small-visibility,medium-visibility,large-visibility” class=”” id=”” background_color=”” background_image=”” background_position=”center center” background_repeat=”no-repeat” fade=”no” background_parallax=”none” parallax_speed=”0.3″ video_mp4=”” video_webm=”” video_ogv=”” video_url=”” video_aspect_ratio=”16:9″ video_loop=”yes” video_mute=”yes” overlay_color=”” video_preview_image=”” border_size=”” border_color=”” border_style=”solid” padding_top=”” padding_bottom=”” padding_left=”” padding_right=””][fusion_builder_row][fusion_builder_column type=”1_1″ layout=”1_1″ background_position=”left top” background_color=”” border_size=”” border_color=”” border_style=”solid” border_position=”all” spacing=”yes” background_image=”” background_repeat=”no-repeat” padding_top=”” padding_right=”” padding_bottom=”” padding_left=”” margin_top=”0px” margin_bottom=”0px” class=”” id=”” animation_type=”” animation_speed=”0.3″ animation_direction=”left” hide_on_mobile=”small-visibility,medium-visibility,large-visibility” center_content=”no” last=”no” min_height=”” hover_type=”none” link=””][fusion_text columns=”” column_min_width=”” column_spacing=”” rule_style=”default” rule_size=”” rule_color=”” class=”” id=””]
The Payments Extension allows users to purchase products in beautifully designed forms with no barriers to entry VIA the Infusionsoft API.
To see a live demo of FormLift payments, click here => https://formlift.net/ultimate-infusionsoft-cheat-sheet/
[/fusion_text][fusion_alert type=”notice” accent_color=”#808080″ background_color=”#ffffff” border_size=”” icon=”” text_align=”” text_transform=”” dismissable=”” box_shadow=”” hide_on_mobile=”small-visibility,medium-visibility,large-visibility” class=”” id=”” animation_type=”” animation_direction=”left” animation_speed=”0.3″ animation_offset=””]
This tutorial requires the FormLift Payments Extension!
[/fusion_alert][fusion_text columns=”” column_min_width=”” column_spacing=”” rule_style=”default” rule_size=”” rule_color=”” class=”” id=””]
It’s a fairly easy process to setup up! Once you install and activate this extension, all you have to do configure some new fields to start accepting payments.
Note: The Infusionsoft payments extension does not need connection to any order forms, any standard web form will do. When a user submits the form, both the web form goal AND product purchase goal will be triggered!
1. Import your form:
Go to Add form, select your form from the drop down, and click Import. Alternatively you may paste in form code and import that way.
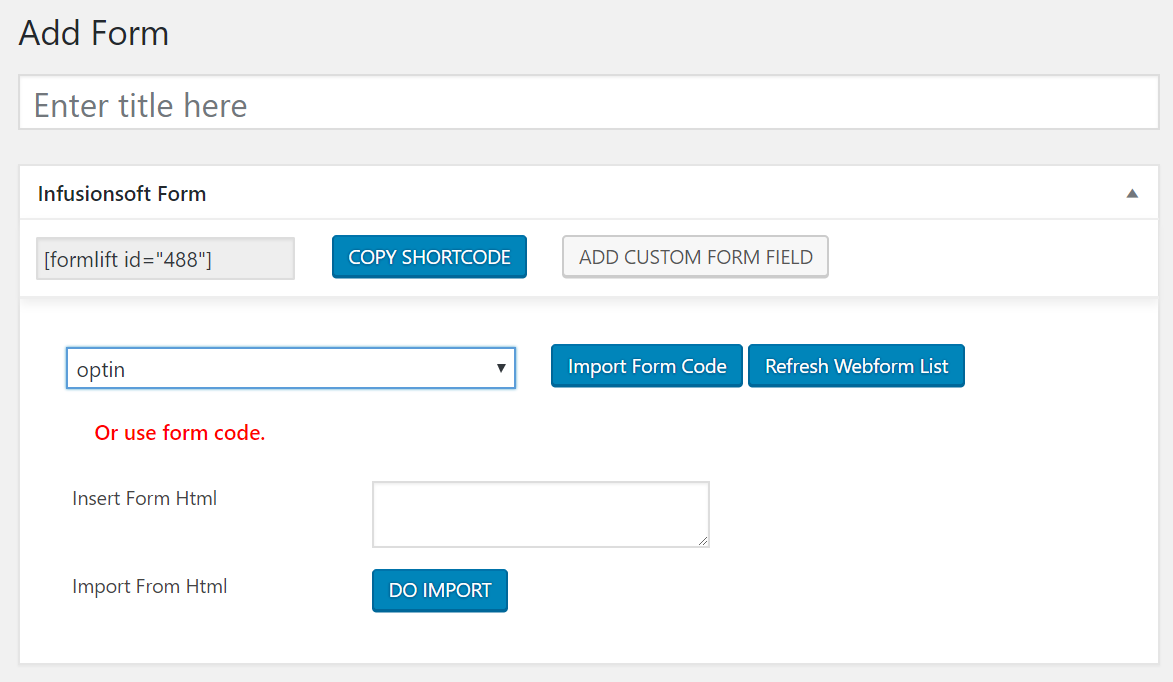
Your form must contain the following for payments to work, or at least the following would have had to be collected in a prior form!
First, Last, Email, Phone1.
If you want to add the fields manually, the field names should be inf_field_FirstName, inf_field_LastName, inf_field_Email, inf_field_Phone1.
[/fusion_text][fusion_text columns=”” column_min_width=”” column_spacing=”” rule_style=”default” rule_size=”” rule_color=”” class=”” id=””]
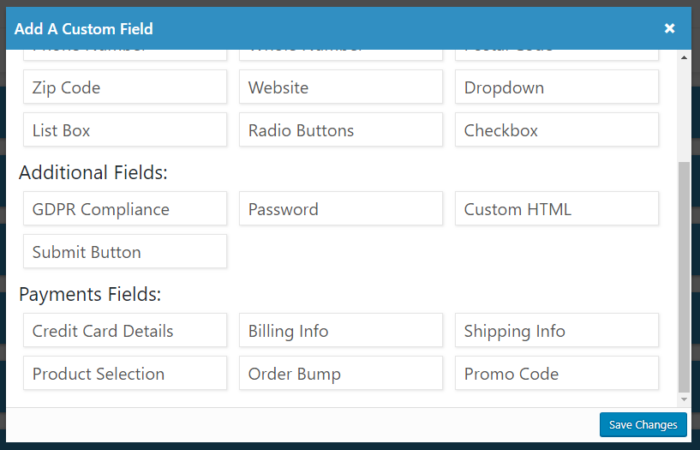
2. Add The Product Selection Field (Required):
Add a custom field and add the “Product Selection Field” which is near the bottom under “Payment Fields”
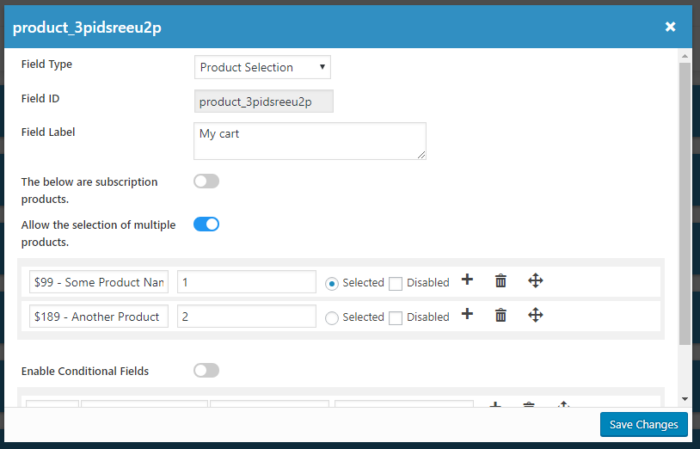
Configure the Product Fields. Give it a label such as “My cart:” and then enter your product names and product Id’s. You may customize the labels in any way you want!
[/fusion_text][fusion_text columns=”” column_min_width=”” column_spacing=”” rule_style=”default” rule_size=”” rule_color=”” class=”” id=””]
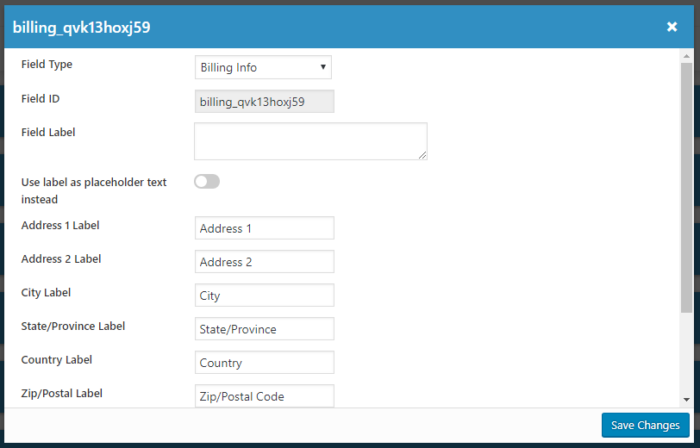
3. Add The Billing Info Field (Required):
Add a custom field and add the “Billing Info Field” which is near the bottom under “Payment Fields”
Configure the labels to your liking.
[/fusion_text][fusion_text columns=”” column_min_width=”” column_spacing=”” rule_style=”default” rule_size=”” rule_color=”” class=”” id=””]
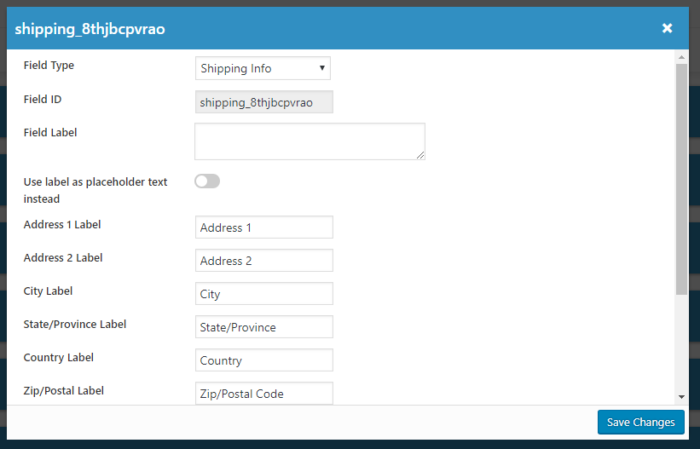
4. Add The Shipping Info Field (Optional):
Add a custom field and add the “Shipping Info Field” which is near the bottom under “Payment Fields”
Configure the labels to your liking.
[/fusion_text][fusion_text columns=”” column_min_width=”” column_spacing=”” rule_style=”default” rule_size=”” rule_color=”” class=”” id=””]
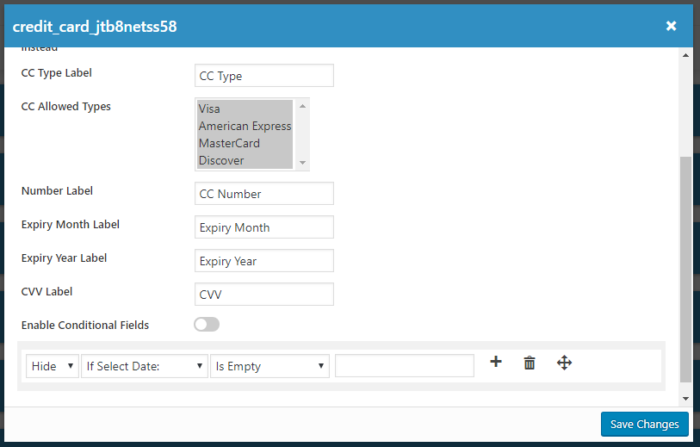
5. Add The Credit Card Info Field (Required):
Add a custom field and add the “Credit Card Field” which is near the bottom under “Payment Fields”
Configure the labels to your liking and select the allowed credit card types.
[/fusion_text][fusion_text columns=”” column_min_width=”” column_spacing=”” rule_style=”default” rule_size=”” rule_color=”” class=”” id=””]
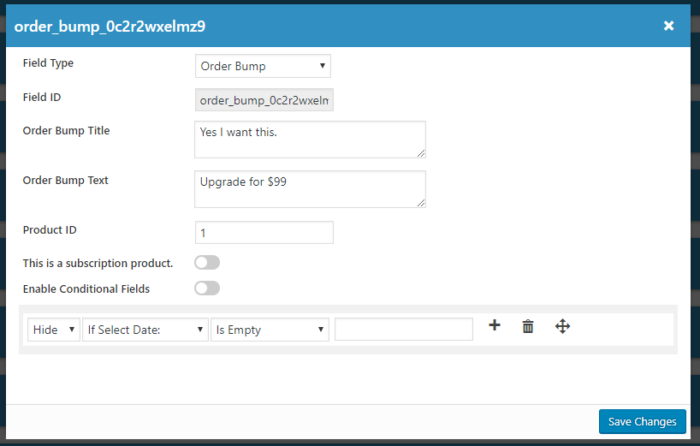
5. Add The Order Bump Field (Optional):
Add a custom field and add the “Order Bump Field” which is near the bottom under “Payment Fields”
Configure the title, order bump explanation, and the product ID you wish to sell.
[/fusion_text][fusion_text columns=”” column_min_width=”” column_spacing=”” rule_style=”default” rule_size=”” rule_color=”” class=”” id=””]
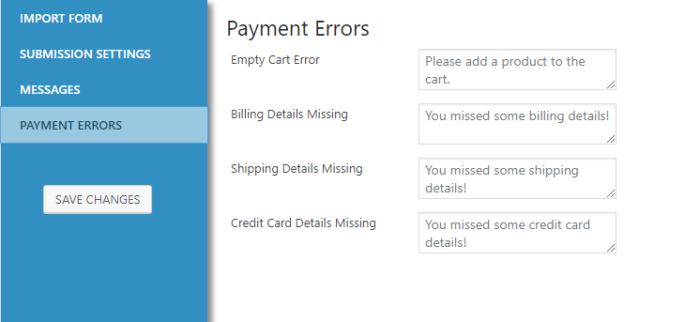
5. Set your error messages (Reccomended):
Go to the settings and configure the error messages for when transactions fail. These are also available to be changed on the form level settings.
[/fusion_text][fusion_text columns=”” column_min_width=”” column_spacing=”” rule_style=”default” rule_size=”” rule_color=”” class=”” id=””]
THAT’S IT!
FormLift payments uses the merchant account associated with the products you enter into the product selection field, and Infusionsoft takes care of the rest.
[/fusion_text][/fusion_builder_column][/fusion_builder_row][/fusion_builder_container]